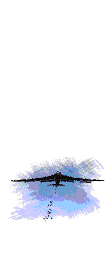
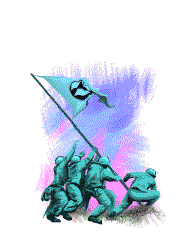
Strategic Conquest
4.0
by Peter Merrill
Produced by Joe Williams
Art by Howard Vives
Manual by Joe Williams,
Ted Alpsach,
And Guy Vardaman
Contents
Contents 2
A Quick Summary 3
Getting Started 4
Installing Strategic Conquest 5
Learning How To Play 8
The Moves Menu 11
Walk Through a New Game 19
Choosing World Size 25
The Pieces 31
Other Notes 42
Changes from StratCon 3.0: 51
Grand Strategy 54
Early Game Strategy 56
Basic Naval Strategy 58
Exploration Strategy 59
Defensive Strategy 62
Endgame (winning) Strategy 64
Common Problems 68
Our Mailing List 71
About Strategic Conquest 72
The History of Delta Tao 74
Delta Tao FAQ 78
About This Manual 80
About the Packaging 81
Technical Support 82
Our Stand on Copy-Protection 83
Suggested Reading 87
Delta Tao's Other Games 88
The Fine Print 89
A Quick Summary
Your goal is to conquer the world. You plan the strategic direction of your military, organize your forces, and expand your empire throughout an unknown and dangerous world. If you were alone, this task would be easy, but you have an adversary with the same goal of worldwide domination.
Build Tanks to capture cities to add to your production. Build Artillery to protect those cities. Build Fighters to rapidly explore the world. Build Transports to carry your troops from your home island to other islands. Build a navy, with Submarines, Aircraft Carriers, Destroyers, and Battleships, to protect your Transports and cripple enemy supply lines. Build helicopters to take out your enemy's ground and seafaring targets. Build Bombers to eliminate large enemy strongholds and damage his production capacity.
Whether you win or lose will depend on your strategic and tactical skill.
Getting Started
We make a lot of assumptions about you as we write this manual. We assume you know your way around the Macintosh, so we aren't going to give you a lot of pansy instructions on how to pull down a menu and launch an application. We're fiercely traditional in our approach to Macintosh applications, so you won't have any trouble doing the standard things, like saving your game, resuming an old one, and so on. All we cover in this manual are the things that really relate to this game, and not to the Mac in general.
If you're a Mac beginner, refer to your Apple documentation and tutorial programs.
Installing Strategic Conquest
To install Strategic Conquest, just drag its icon from the floppy disk that came with this package to your hard drive.
Potential Installation Problems
We're usually so brief that the above would be the whole explanation. Since we're trying to fluff out the manual, however, we'll cover all the potential problems you may face in installing Strategic Conquest.
I don't have a hard drive.
It is possible to run StratCon from a floppy. You'll probably want a two-floppy setup with a System floppy in one drive and our disk in the other drive. This will launch and run slowly, but it'll work. Consider buying a hard drive -- they're cool and cheap. As we write this, you can get a 730 meg drive for $229.
My Mac puts up a dialog that says something like, "Do you want to initialize this disk?"
You don't want to initialize it. Honest. You've got a problem:
a: Your floppy drive is a piece of junk that can't read disks.
b: Instead of inserting the Strategic Conquest disk, you put in Word for Windows.
c: There's something wrong with the StratCon floppy.
Try ejecting the disk and putting it back in a couple of times--sometimes this works. If you have a disk utilities program (like Norton Disk Doctor), you should try to recover the floppy with that. If these things don't work, you'll have to give us a call and beg for a replacement disk. Our number is (408) 730-9336.
My Mac puts up a dialog saying something about my disk being full.
This is just a hunch, but maybe your hard disk doesn't have enough space left to fit the game. Throw away some useless stuff on your hard disk, like those 200 copies of TeachText, the extra System Folders, or King's Quest LXII.
I don't have the floppy disk.
It must have been lost somewhere, unless you've been doing some stupid software piracy where you copy the documentation instead of the software. Look for it. Maybe we forgot to put a disk in the package. Maybe it fell out. Maybe your dog ate it. (If you don't have a dog, come and get ours.) If you can't find it, call us, and we'll gripe at you and send you a replacement.
I don't have a floppy drive.
What have you got, a PowerBook 100? Sheesh, get an external drive. Or you can pass StratCon across the network with File Sharing or the like. Or you can just put the disk near your computer and hope that the information oozes across by osmosis.
I don't have a Macintosh.
You're starting to get tricky, now. Buy a Macintosh. You'll like it.
Learning How To Play
Here's the easy way to learn to play Strategic Conquest. Just choose "
" from the "
" menu after starting a game. In a blinding whirr of lights and noise, the Mac will play your game for you while you watch. You'll see how it goes about exploring the world, loading and unloading Transports, moving boats, fighting, and so on. This will at least give you an idea of what a real game looks like.
Moving Pieces
There are a couple of different ways to make your pieces move around the map. The piece that you're moving is the piece that's flashing. If nothing seems to be flashing, select "
" from the "
" menu. This will make sure that the piece you're supposed to move next is on the screen. Once you see the piece that's flashing, decide where you want it to go. Choose a square next to the flashing piece) Click on that square. Voila! The piece will move there. Keep doing this with whatever piece flashes next.
Due to numerous requests from StratCon players of earlier versions who began to suffer from "Mouse-Wrist" (a deadly strain of Tennis-Elbow), we've provided a way to move pieces without using your beloved mouse. If you have a numeric keypad on the right side of your keyboard, look at the numbers on it. The "5" is your center point; all the numbers around it allow for movement in the appropriate direction. For instance, pressing "6" will move the current piece one space to the right, and pressing "1" will move the current piece diagonally down and to the left.
Note: Throughout this manual we keep saying "armies" when we're referring to both Tank and Artillery pieces. We could have been technically correct by calling them "Land Based Offensive and Defensive Military Units" but then the manual would be about thirty pages longer. In related areas, we've called Fighters, Bombers and Helicopters "Aircraft" and everything that moves in the water "Ships," including subs, though we know we're offending naval purists by doing so.
Of course, there are faster ways to move pieces. Let's say the place you want a piece to go is more than one square away. Instead of walking it there one square at a time, you can click and drag the piece to its destination. It will travel there at its own pace, and you won't have to do anything new with it until it gets there. This is especially cool with aircraft, because they move so far each turn that moving them one space at a time to their destination and back is a pain.
When dragging armies and ships, the path will bend and curve automatically as you go around water and land, respectively.
As you drag, you'll notice the number by your cursor changes to reflect the distance you're dragging. This is quite helpful for aircraft, since they can only go a limited number of spaces before refueling.
The Moves Menu
Sometimes, even clicking and dragging a piece gets cumbersome. For this reason, we have added several slick ways to move pieces. Here they are.
Sleep
When you have a piece that doesn't need to move for a while, you can put it to Sleep. When it comes time to move the piece, just select "
" from the "
" menu, or type
S
on the keyboard. The piece will stay where you left it and not bother you again until an enemy goes by it or attacks it, or you tell it to wake up when you want it to move.
Wake
When you put a piece to sleep, or change your mind about where a piece should go, you can wake the piece up and have it ask for new instructions. Just select "
" and click on the piece you want to give new instructions to or type
W
. If it's your turn, the piece will begin flashing, and you can move it right away. You can also wake pieces that are moving Randomly, that are Patrolling, or that you have set to Automatically move. Keep in mind that if you wake a piece after it has already moved that turn, you won't be able to give it new instructions until the next day. Make sure to woke up all the pieces early on in a turn, so that you can move them during that turn.
Random
This is a move you give to a piece when you really don't care what it does. You want it to just wander around randomly and see what it bumps into. It isn't a good idea to give this instruction to aircraft, since they probably won't randomly refuel and will undoubtedly crash. To move a piece randomly, just select "
" from the "
" menu when the piece flashes, or type
R
. A randomly moving piece will wake up if it encounters an enemy piece. Use "
" to give new instructions to the piece.
Patrol
This is a good instruction to give a piece that you want to pace back and forth between two points, looking for enemy intrusion. For example, you could give it to a Helicopter defending your island, or a Destroyer guarding a strait. Just select "
" from the "
" menu (or type
P
), and click and drag the route you want a piece to patrol. It will pace there relentlessly until you wake it up or it bumps into an enemy piece. If you give this instruction to aircraft, make sure they have enough fuel between patrol points or they'll end up splattered somewhere between the two patrol points, which isn't considered to be a very good defense.
City Aircraft Destination
You can set a City Aircraft Destination to provide a quick way for your aircraft (Fighters, Helicopters and Bombers) in the backfield to find their way to the front line without you having to manually move them there. Just select "
" from the "
" menu (or type
C
) and click and drag from one city to another. From then on, whenever an aircraft reaches the first city (or if an aircraft piece is built there), it will automatically fly to the second city.
You can set these destinations up in a chain, so that airplanes built in the back row hop from city to city to the front without your intervention. You can turn off a city's aircraft destination by just setting it to itself--just type
C
and click on the city once to remove the destination instruction from it.
Don't set up a City Aircraft destination between two cities that are more than 20 spaces apart. The planes will mindlessly run out of fuel in a pathetic attempt to follow your orders.
Army Destination
The Army Destination is very similar to the City Aircraft Destination. The main difference is that it only affects Armies (both Tanks and Artillery) that are actually built in that city; it doesn't affect Armies that are passing through. This move lets you, for example, have all of the cities on an island automatically send all the Armies they produce to one location on the coast, where you can easily pick them up with a Transport.
This is an important move, since it will save you loads of time while playing the game.
To use Army Destination, choose it from the "
" menu (or type
D
), then click and drag from a city building armies to where you want its armies to go.
Transport Load
When you want to load a Transport, you can just move each Army you want on the Transport onto the Transport. There is an easier way, though. Just put the Transport next to a bunch of Armies on the shore, and choose "
" from the "
" menu. Then click on the Transport you want all the nearby Armies to leap onto. They will wake up, hop onto the Transport if necessary, and then go back to sleep.
My personal favorite way to load a transport is to put a pile of Armies in a port city, and just pull the transport into the city and out again. All the Armies will automatically get on board. This is much better than "
," which sometimes takes a couple of turns for the Transport to notice that it's full.
If you don't want to wait for more armies to load, you can wake up the transport by typing
W
.
Stack Move
Sometimes you'll want to move a pile of pieces, usually Armies, all at once. Choose "
" (or type
M
) and click and drag where you want the stack to go, just like the "
" move. All of the pieces in the stack will go there without your having to move them one at a time.
Skip
If a piece is flashing for you to move it, but you don't feel like moving it this turn, you could just click on it, telling it not to move. If it has more than one move left, you'll have to click on it multiple times, until it runs out of moves. An easier way to have it just sit tight until the next turn is to select "
" from the "
" menu, or just press
N
.
Move Later
Sometimes you won't want to move a piece yet when it starts flashing. Just type
B
or select "
" from the "
" menu. The piece will begin flashing later on during your turn; you can move it then, or type
B
again to wait until the end of your turn to move it. This is useful for situations where you might want to move the current piece different depending on the outcome of a battle, whether or not a city is conquered, or something else.
If you decide you want to move a piece right away after you've told it to Move Later, just Wake it up by typing
W
and clicking on the piece.
Automatic
When a piece is blinking, select "
" from the "
" menu, or just type
A
and the current piece will move around by itself, fairly intelligently. This command is useful for early in the game when you have a lot to explore but are tiring of dragging fighters everywhere. Set them to automatic, and they'll explore for you. And unlike when they're set to Random, they'll refuel when needed.
Don't be surprised if pieces you've set to automatic do stupid things that you would never, ever do. Or if they do the opposite of what you expect them to. Setting a piece to automatic is most useful for the piece to be doing something when you are occupied elsewhere. Wake the piece to regain control over it.
Walk Through a New Game
Launch Strategic Conquest. The Game Set-Up menu will appear on your screen, allowing you to select a game difficulty level from 1 to 15, with 15 being the most difficult. For starters, just choose level 1. This dialog will also let you arrange a two player game, set up the terrain type, and specify the size of the World, but we'll ignore those options for the time being.
Strategic Conquest will then think for a while. It's generating a complete world, with continents, oceans, seas, cities, and so on. When it gets done figuring this out, it will show you your initial city, and let you choose your initial production. To start with, you'll almost always want to build either a Fighter or a Tank -- the more expensive pieces aren't so useful yet. In this case, build a Fighter by clicking on the little circle next to "Fighter" and then clicking the OK button.
Your city is now set up to build Fighters. In six days, it will finish the first one, and you'll be able to use it to explore your home island. Fortunately, those first six days that you can't do anything pass very quickly.
Now it's day 6, and your Fighter is finished. At the top of the window, a message will tell you what you're moving now, how far it has left to move this turn, how much fuel it has left, and so on. In this case, it says, "20 moves remain, strength 1, fuel for 20 sectors." It also has a picture of a Fighter in the upper right corner, and the piece you're getting ready to move will be flashing on the screen. Because the Fighter is in a city, it will appear that your city is blinking.
Any piece you have can "see" one space in all directions. Before you've explored an area, it will appear black, meaning you have no idea what's there. It could be land, water, a city, or an alien dreadnought that's landed to refuel (although the latter is quite unlikely in this game). Once you've explored a black area, you'll see what type of terrain it is, and you'll always be able to see that on your map.
This seeing ability only works for the current turn. For instance, if you fly a Fighter out over the sea and it runs past an enemy battleship (uh-oh), the enemy battleship will appear on your map for that turn. The next turn, however, will not show the battleship unless your fighter is still right next to it (unlikely, given the tendency of enemy battleships to take out your fighters).
The fuel remaining on your airplane is pretty important. With 20 fuel, you have enough to move out 10 sectors and back 10, where it will refuel in the city. If you move out 11, you'll run out of fuel before you make it back to your city. This is bad. Expect to run a few Fighters out of fuel before you master the game.
Anyway, click and drag from the city (your Fighter is in there, honest) to some place you'd like to explore. The message bar will tell you how far you've dragged. Make your Fighter go 10 spaces. Then drag it back to the city you started in. You should be able to see a lot more of the world than you used to. Now, on day 7, go in a different direction. And day 8, and 9. Try to explore as much of the world as you can reach.
With luck, you'll discover a couple of empty cities (they're gray and desolate looking) in all of this exploring. What you'll want to do next is build an Army and march to the nearest empty city and capture it.
Unfortunately, your first city is still building Fighters. What you'll want to do now is convert that city to building Tanks. Just double click on the City, and the City Production dialog will come up again. This time, make the city build a Tank instead of a Fighter.
If you've been following the instructions closely, you'll notice that there are two days left before the Fighter being built is finished. If you convert the city to building Tanks now, you'll lose the days already spent on Fighter production. In real life, you wanted to convert the city to building an Army just as soon as the first Fighter was finished. But I forgot to tell you that.
A good solution at this point might be to simply finish the second Fighter, and then start building Tanks. The second Fighter will come in handy sometime.
Anyway, just keep exploring with your Fighter (or Fighters) until you finish your first Tank, then roll it toward the nearest city. When you finally capture it (by running the Tank into it), march another Tank toward another city. Remember that any Army (whether a Tank or Artillery) is effectively lost when occupying a city. Once it captures a city, it's no longer a piece. No problem, though. Just have the second city build Tanks too.
When you capture all the cities on your home island, or close to it, have one of the port cities build a Transport, and start marching Tanks toward that city, so they can get on board when it is completed.
Choosing World Size
When you begin a new game, you have the option to play on a small, medium, or large size world by dragging the middle slider to the left (small) or right (large). The small world is great for a quick battle that could last anywhere from a half-hour to two hours. The medium size world could last between a couple hours and a day of play time. The large world is good for killing at least an entire day, and sometimes can take up your entire vacation.
Making your world habitable for Kevin Costner or Mel Gibson
If you liked Waterworld, drag the bottom slider in the game setup window to the left. The world generated by the computer will consist of lots of teeny islands, scattered about a vast ocean. Ruling the ocean is key here, as you'll need to provide safe passage for transports and carriers, your only ways of getting from island to island.
The medium setting keeps the land and water ratio to about 40% land, 60% water. In this scenario, ruling the sky, continents, and oceans are equally important.
If you drag the slider to the right, this "Road Warrior" world will consist of a giant desert with lakes randomly scattered throughout it. In this scenario, massive ground forces are necessary to survive, let alone conquer the world.
The Map Window
The world is a big grid consisting of water and land squares. When you begin a new game, a new map is generated from billions and billions of possible configurations. The chances of you playing the same game setup twice if you played nonstop 3 hour games for the next 50 years is just under a million to one. If this happens, let us know, and start attending the StratCon Anonymous meetings in your town.
Unless you have a very large screen, only a portion of the world map is displayed on the screen at once so that you see a more localized region in greater detail. You may scroll your map window in any direction with the scroll bars or by pressing the arrow keys on your keyboard. If you have a color Mac, the land will be tan/green and the water blue.
Armies can't move in the water (unless they are on a transport), and ships can't move on land (except port cities). Trying to do either of these things will destroy that piece. Even though it appears that there are several different types of terrain, Tanks and Artillery move the same over all of them. It takes no longer to move a tank four sectors on the beach than it does on the high grasslands of an island.
Looking At The World Map
To look at the entire World Map as you know it, select "World Map" from the "Displays" menu or type "G." This will show you a shrunk-down version of the world, and give you an idea of where you lie in the big picture. The edges of the world don't wrap.
Cities
There are 3 types of cities: those controlled by you (blue), those controlled by the enemy (red), and those empty cities that aren't controlled by either side (gray).
Cities that are located immediately adjacent to an ocean sector are Port Cities. Port cities are especially important because they are the only cities that can build and repair ships. Blockading enemy ports is sometimes an effective method of shutting down his naval attack.
Cities that aren't port cities can only build Tanks, Artillery, Fighters, Helicopters and Bombers. Usually you'll want your islands near the front line of the battle to build Tanks and Artillery, while well defended cities to the rear build aircraft, which can reach the front quickly.
When a city has pieces in it, the number of pieces shows up in the upper left corner. Cities are never located on a sector that is on the edge of the world, and two cities are never located on adjacent sectors.
The City List
By choosing "City List..." (or typing "F") from the "Display" menu, you can get a summary of all your cities' production. This will give you an idea of when a critical piece will be finished, how your future balance of hardware will look, and things like that.
If you see a city where you want to change the production, click on the city name and the City Production dialog will appear, allowing you to change the type of piece that the city is currently producing. Remember that if you change the type of piece production, any production on the previous, yet-to-be-built piece is sacrificed, and you'll start all over again.
The City List has some other very useful information. It tells you how many cities you have (nice, not a big deal), and also shows how many cities your enemy has. This is a good indicator of where you stand compared to the enemy during the game, and can significantly alter your strategy if used wisely.
The Pieces
There are several different pieces in Strategic Conquest. Each has certain advantages and disadvantages. Balancing your forces is an important key to success.
Tanks
Strength: 2
Speed 2 sectors/day
Cost: 4 days
Attacks: 1/day
The Tank is the basic unit in Strategic Conquest. It is one of the two pieces that can capture cities (the other is Artillery). Tanks can only move on the land, but they can move at 2 spaces a turn (as opposed to Artillery Units movement of 1 space per turn). They're cheap, though, and are quite useful for attacking neutral and enemy cities. In addition, Tanks are the piece of choice for invading enemy territory en route to enemy cities, as their speed and resilience increases their chances of making it to the enemy city without being destroyed first.
Artillery
Strength: 1
Speed: 1 sector/day
Cost: 4 days
Attacks: 1/day
Artillery units are land-based pieces that -- while slow and wimpy -- can be used as an effecting defensive force because of their ability to fire upon targets several spaces away. When an enemy piece has been discovered within the artillery's range (up to three spaces from the piece), a red square outline will appear around the artillery unit. You can then place the cursor on an enemy piece (or an enemy city if an enemy piece is within it), and the cursor will change into the shape of a bomb. Click when the cursor is a bomb and a shell will be fired from your artillery unit at the enemy piece.
Because of the Artillery unit's lack of speed and self-defense, artillery units are much more suited for defense of cities and islands. If used in tandem with patrolling Fighters and Helicopters (which can spot enemy pieces easily), effectively placed artillery units are a key to defense.
Fighters
Strength: 1
Speed: 20 sectors/day
Fuel: 20 sectors worth
Cost: 6 days
Attacks: 2/day
The Fighter is primarily a reconnaissance piece, though it can be used to fight enemy aircraft. Its great speed means you can do deep surveillance of enemy and uncovered territory much faster than any other piece. It isn't particularly good at attacking, except against other aircraft (Fighters, Helicopters or Bombers), when the attacker has an advantage.
Helicopters
Strength: 2
Speed: 10 sectors/day
Fuel: 20 sectors worth
Cost: 8 days
Attacks: 2/day
Helicopters are powerful pieces that are a integral part of any invasion or defensive force. Their strength is in destroying ground and sea based targets, which they do quite effectively. Helicopters can be used prior to an invasion to rid an enemy island of Tanks and Artillery. For defense, Helicopters can patrol offshore looking for enemy Transports and Carriers. Helicopters are most vulnerable to attacks by enemy Fighters and Artillery Units.
Transports
Strength: 3
Speed: 3 sectors/day
Cost: 8 days
Attacks: 2/day, but don't bother
Transports are used to move Tanks and Artillery across the sea. They never win when they attack anything, even other Transports. They have defensive weaponry, and can sometimes kill attacking boats and planes, but they are particularly vulnerable. A Transport carrying six Armies (its maximum) costs a total of 34 days production (10 days to build an army, 24 days to build 6 Army pieces), almost as much as two Battleships, yet it can be shot down by a single Helicopter. Protecting your Transports, at least when they're loaded, is one of the more important aspects of the game, since without them you can't take the enemy islands.
The number in the upper left corner of a Transport shows how many Armies are on board.
Here are some tips on unloading Transports. Armies automatically fall asleep on Transports until they pass by an empty or enemy city. To unload them on a newly discovered island, you'll have to wake them up. Unfortunately, they usually do their "Sleep" move just after the Transport finishes moving. They will also go back to sleep at the end of a turn, or any time you click and drag the Transport, instead of single clicking it. The best way to make sure you wake the grunts up, therefore, is to wake the Transport up one space before it gets to the island, and then to single click it next to the island. You'll then be able to move the Armies off immediately.
If you drag the Transport to move it, all the Armies on it will go back to sleep, even if you just woke them up. Therefore, just click in the square you want the Transport to move to, or use the numeric keypad to move the square one space at a time.
Destroyers
Strength: 4
Speed: 4 sectors/day
Cost: 8 days
Attacks: 2/day
Destroyers are the fastest boats on the water. This means they can catch retreating Transports and Submarines and sink them, and also means they can successfully retreat from enemy Carriers and Battleships, which would make short work of them. They are especially effective against subs, since they're the only piece that can see a sub as if it were a normal ship. They aren't very effective at shelling grunts on the shore, since they have little brute strength, and would spend most of their time returning to port for repairs.
Submarines
Strength: 3
Speed: 3 sectors/day
Cost: 8 days
Attacks: 2/day
Submarines have two advantages: stealth and amazing offensive firepower. A Submarine isn't revealed to enemy ships when it moves next to them, or when they move next to it (except for Destroyers). Furthermore, a sub can often kill a fresh Carrier or Battleship with two attacks. Unfortunately, they aren't very good defensively. When they finally are exposed, they can be killed by virtually any boat. Their biggest weakness, however, is to Helicopters. Submarines aren't equipped with any antiaircraft weapons, so 'copters can attack with total impunity. This makes the sub less suitable for ventures into enemy territory, where enemy planes are more common. However, a small wolfpack of submarines are terrific for protecting one's own harbors, especially against stray enemy Carriers, Battleships, or Transports. Not so good against enemy Destroyers.
Carriers
Strength: 12
Speed: 3 sectors/day
Cost: 10 days
Attacks: 2/day
The Carrier is often used as a moving city, on which Fighters and Helicopters can base their operations. In the center of a fleet, it (through its aircraft) can give vital information about the location and strength of the enemy ships. A Carrier can also be used, in conjunction with perhaps two airplanes, to explore huge swaths of unexplored territory very quickly.
Carriers don't have a lot of offensive firepower, but they can withstand some serious pounding before needing repairs or (gasp) sinking. A word of warning: when a Carrier gets destroyed, all the aircraft on that carrier are destroyed with it.
Battleships
Strength: 18
Speed: 3 sectors/day
Cost: 20 days
Attacks: 2/day
The Battleship is the most powerful thing in the water, offensively and defensively. When attacking, it can sink any boat except another Battleship. The only thing that can have much luck attacking it is the Submarine, and even that is questionable. The Battleship's very high strength makes it ideal for pounding the shore and eliminating enemy troops. A lone Battleship can often sink two or even three enemy Carriers before succumbing. Of course, it's even better when supported by a fleet, reducing its vulnerability to enemy subs and larger enemy fleets.
One of the most powerful aspects of a Battleship is its ability to fire shells (just like the Artillery Unit) at far away targets. While these shells don't do as much damage as a direct attack from the Battleship (when an enemy piece is right against it and you move the battleship into that piece), the Battleship cab never sustain damage from a shell it fires.
Bombers
Strength: 1
Speed: 10 sectors/day
Fuel: 30 sectors worth
Cost: 20 days, plus 5 days more for each 50 days into the game
Attacks: 1/Life of Bomber
The Bomber is a one-shot piece. As it passes over an enemy piece, it detonates, killing all beneath it, whether it be thirty grunts, a Battleship, or an enemy city. The Bomber, however, is destroyed as well.
Initially, the Bombers have a radius of 0, and can thus only destroy one square. However, for Bombers started after day 50, the radius of the Bomber goes up to 1, meaning that the same bomb can now destroy 9 squares and everything in them. After day 100, Bombers will have radius 2, and will destroy a total of 25 squares.
Bombers are best used to lay waste to an enemy island as you assault it. A well placed Bomber can often destroy double or triple its own cost in enemy troops, plus neutralize the production of an enemy city. However, they are vulnerable to attacks from everything (except Submarines and Transports) and are very expensive. Keep Bombers well protected with an escort of Fighters and Helicopters
Other Notes
Automatic
This menu allows you to specify that certain piece types should be moved automatically, or that city production be set automatically, or that everything is automatic.
To make all pieces of a certain type automatically move, select that option from the Automatic menu. To regain control of it, select that option again from the menu. You can tell what pieces are automatic by looking for checkmarks next to items in the menu; if a checkmark is there, that piece is set to automatic movement.
You can have your production (what your cities make) automated as well. Once you choose this, your city production dialogs will stop appearing, and the computer will decide what is best for you. You can "skew" the production results by selecting "Production Quotas" from the "Automatic" menu (or by typing "H") and dragging the sliders to represent how much of each piece (percentagewise) you want.
To make everything automatic, select "All Automatic." To make everything manual, select "All Manual." Duh.
The Lazyboy General
If you like being in charge, but don't want to be involved in the day-to-day blood and guts of fighting, select "All Automatic" and then select "Attack Island" and click on the island in the world that your forces should center their attack on. Your pieces will focus on capturing (or defending) that island until you select another island to concentrate on.
Square occupancy
In most cases, you can have as many pieces as you want occupy the same square. For instance, you can have a Fighter, Tank, and two Artillery Units in the same square of land. And you can have a Helicopter and a Transport occupying the same square.
But (you knew this was coming, huh?) you can't have more than one ship in the same square. That means no more than one Battleship in the same square in the ocean. If you try to move two ships into the same square, you'll sink one of them. Oops.
You can move Fighters and Helicopters into an enemy city. This is a great place to hide from the enemy, while being able to see what is coming out of that city. You don't refuel in an enemy city, however, and if an enemy moves a piece into his city, you'll be attacked in the process.
Repairing Ships
When a ship is wounded in combat, you can repair it. Just bring it back to a friendly city, and park it. It will repair itself at a rate of 1 strength point per day. You can heal as many ships in a city as you want. You can put them to sleep in a city and they will automatically wake when they're fixed.
Remember, though, that ships in port are extremely vulnerable. Enemy Aircraft, Armies, and ships can all wreak massive destruction on a fleet in dry-dock. A Bomber, of course, will kill everything in a city.
Shelling the Shore
For a Carrier or Destroyer to hit an Army on the shore, just click on the Army you'd like to hit--don't click and drag onto the Army, or StratCon will think you're trying to run your boat aground. With a Battleship, you can shoot much farther.
Two Player Games
It's easy to set up a two player game. First, get two Macs on an AppleTalk network (we recommend Ethernet cabling if you have it). Run Strategic Conquest on both machines. Choose "AppleTalk Master" on one machine and choose "AppleTalk Slave" on the other. This isn't computer S & M. It just tells us which machine is really running the game. It doesn't matter what skill level you set the game at in the two player game--it always starts out relatively fair.
We don't recommend running Strategic Conquest with two people on one Mac. It takes forever to do a game, and ends up being musical chairs. Plus, you can't watch your pieces while the other guy does his moves, and you can miss a lot. We did leave this feature in, however, just in case you really want to do two people on one machine.
Because there is already a lot of waiting involved while someone else is moving, everything builds and moves twice as fast in two player mode. Even with the "faster" production times and piece movements, there gets to be a lot of down time between turns, especially in the later stages of the game. Whatever you do, don't go off to see a matinee while you're waiting for your opponent to move. If he runs into or past one of your pieces or cities, you'll be able to spot his pieces. If he attacks you, you'll see the battle and its results. I'd recommend reading a magazine while waiting, or you'll start getting real antsy, calling out rude things to your opponent, like "While we're still not really old, please," or "If you don't finish your turn soon...[insert threat here]."
Statistics
What would Desert Storm have been without those cool charts and updates from Stormin' Norman and General Powell? I'm not sure, but it wouldn't have been nearly as much fun to watch on TV. Select "Game Statistics" from the "Display" menu (or type "U") to display a cute little box with all sorts of useful information in it.
This is a quick way to check your current production/current pieces status to see if you are building enough pieces of each type. It's also useful to find out what pieces the enemy is destroying most, and what of his you're destroying most.
Piece Info
Selecting "Piece Info" from the "Display" menu (or double-clicking a piece) will bring up information about that piece, like if it was moved that day, its strength, fuel, and location. If there are more than one piece in the same location, clicking on the display will show the info for the next piece.
Saving, Ending, Quitting
Games are automatically saved at the end of the computer's turn (or the Slave's turn-player 2-in two player mode). If you want to end the game, click the close box in the upper left corner of the window. To Quit, press Q. Doing either will make a dialog box appear asking if you want to do that now, or after the current turn.
Opening Old Games
To open a game you've saved, select Open from the first dialog box and find the game you were playing. If you are currently playing a game and want to open another game, select "Open" from the "File" menu.
Winning and Losing
You win a game of Strategic Conquest when the enemy surrenders to you. When playing against the computer, there is a certain point when the enemy will realize that it's futile to continue, and it will ask to surrender to you. If you say yes, the game will end and you will get to name a city. If you say "No Way" then the game will continue. The enemy will soon ask to surrender again. To win against a person, usually you'll find out you've won by your opponent bursting into your room, cubicle, or wherever you are, cursing, screaming and crying. "I Quit!" from a human is the same as "General, will you accept my surrender?" from the computer.
If the enemy has the better of you, you can keep playing until you are down to your last piece or city. Once you have no more pieces or cities, the enemy computer will gleefully exclaim that he's crushed you like the bug you are. If you're losing to a human, you can quit gracefully ("My friend, you are the better man") or do what I do and say that your setup wasn't fair, that your opponent had better cities, it seemed he never lost a battle, and his computer is faster, it must be, or you would've won.
For the record, it is bad etiquette to just quit, or to set your computer to "All Automatic" and go out and get a beer without telling your human opponent first. The nice thing to do is to compare maps, like gentlemen. Then beat the pulp out of him when he turns around.
Changes from Strategic Conquest 3.0:
Two new pieces added: Artillery and Helicopters
Artillery Units can fire on enemy pieces that are up to three squares away.
Helicopters are designed for attacking ground and sea-based pieces, and are quite vulnerable to enemy fighters.
Tanks now move 2 spaces per turn.
Carriers can carry Helicopters as well as Fighters.
Battleships can shell enemy pieces that are up to three squares away.
256 Color support.
Fractal worlds.
There are now three map sizes to choose from when beginning a new game.
Three terrain types to choose from: Islands, medium, and Desert.
The cities have names.
Enhanced artificial intelligence for the computer player.
A snazzier, more in-depth manual.
Key commands were added to scroll: Use the arrow keys on the keyboard to move the screen one square in that direction.
Numeric keypad moves the pieces now.
More key commands added for almost every function.
Statistics window.
Lots of new graphics and sounds.
"Automatic" menu added, giving the ability to set individual pieces, specific piece types, and production to automatic.
Production Quotas dialog.
Attack Island option for focusing efforts on a single island when in automatic mode.
Open/Quit options added to the initial dialog box.
Icon in the upper right displays the piece being moved by the enemy.
Lots of other stuff I forget right now.
Grand Strategy
When playing, you can sometimes lose sight of your objective during the game, which is quite simply: Conquer the World.
Don't let anything slow you down, distract you, or prevent you from accomplishing this goal.
In playing StratCon, remember the most valuable asset you have is your cities. And the more cities you have, the more powerful you are. Once you have more than 1/2 the cities in the world, you are on your way to global domination. In fact, the sooner you have more cities, the better, so focus primarily on getting as many cities as possible, without losing any.
Your power can be measured in something called City-Days. If you were to figure out how long you've had each city, and add those days together (if you had three cities, City1 for 10 days, City2 for 15 days, and City3 for 20 days, you'd have 45 City-Days), those would be your City-Days. The more of those you have, the better.
A typical mid-size game has about 6000 City-Days worth. That can make losing Battleships (20 City-Days worth) seem like the tiny loss they really are.
Early Game Strategy
Build a Fighter first, then on your first turn to move it, build a Tank. If you have a port City, build a Transport next. Explore as much as possible with the fighter. If you can't spot any offshore cities, send the first transport out on a zig-zagging search mission with 4 armies. Next send out a Destroyer to help hunt down more cities.
Get a foothold on at least two continents before engaging the enemy.
Don't be afraid to lose a fighter so you can explore further than you could otherwise. A fighter is only worth 6 City-Days, in a game that can have thousands of City-Days.
First Contact Strategy
The first time you run across an enemy piece or city is the turning point in the game. It changes from just exploration to exploration and battle, and your resources must change to reflect this.
If the enemy is a lone ship (usually a Destroyer) in "your" waters, make an effort to kill it. Otherwise it can map out where your port cities are, giving the enemy a target. If your Destroyer runs into the enemy, run and hide. When you think you're safe, continue mapping.
If you find an enemy city near your cities early in the game, it usually isn't worth your effort to mount an invasion this early in the game. You need more resources usually than you'll have at first contact. Instead, focus on building up defense for your cities that are nearby, and are most likely to be invaded by the enemy.
Basic Naval Strategy
There is a Rock-Paper-Scissors game in the waters of Strategic Conquest. Each piece has strengths and weaknesses, so that a balanced navy tends to be better than a one dimensional one. Submarines beat Battleships and Carriers, which in turn beat Destroyers, which beat Submarines. The winner of a naval battle will be the one who has his strengths attacking the other's weaknesses, his rock against the enemy's scissors.
The key to doing this is information. If you know exactly where all of the enemy pieces are, you'll be able to pit your subs against his Carriers, your Destroyers against his subs. Of course, he'll be trying to do the same thing to you.
One exception to the normal naval strategies is the transport. If you run across a transport, you must do your best to destroy it, especially if it is heading towards your shores. If your transport is discovered, do your best to defend it and hide it.
Exploration Strategy
The more cities you find, the sooner you can send a transport there full of Tanks to get them, so it is imperative you explore as much as possible as soon as possible. Use Fighters to explore the areas around your cities as quickly as possible. Use Carrier-based Fighter exploration expeditions to search large offshore areas quickly. Send out Destroyers to the far corners of the world to map out continents' edges and islands quickly.
Send Transports with at least 2 Armies on them to offshore cities as soon as they are discovered. When you conquer a city on an offshore continent that hasn't been explored, make an army first, and if you can't fly a fighter there, a fighter next.
Establish cities in all four quadrants of the world, especially the corners.
Invasion Strategy
An invasion into enemy territory requires a well thought out plan. You'll need the invasion force in the form of transports filled with armies, air support for the troops, an offensive and defensive fleet of ships to attack and remove enemy ships while defending the transports from attack, and (if possible), bombers to make a hole in the enemy's forces right before the invasion.
There are two techniques to invading that seem to be effective against any opponent:
The Diversion Force
This technique involves many more forces than a full frontal assault, but it is significantly more effective. Set up two different forces, one for the invasion, and another for the diversion. Start two or three days earlier with the diversion force, going against the enemy in a far off part of the world. He'll respond, like any enemy would, by sending most of the available forces there. Then move in with the real invasion force, confusing the enemy, and possibly catching several pieces in useless mid-transit, having to change position and thereby wasting several precious days.
The Edges/Back Door Gamble
This method is very useful for when the target city is near the edge of the world. Send the entire invasion force along the edge of the world where they are least likely to be discovered, and invade the continent from the enemy's side. Beforehand, try to sweep the corridor clean with a few Battleships.
Preventative Defensive Strategy
To keep the enemy out of your continents, start by having fighter and 'copter patrols shooting out in all directions from your port cities. This can be an early warning system for enemy transports and bombers. In addition, have several artillery units around the coastline so the can assist in shelling the enemy, and if the enemy does get past the patrols, they'll pick up the landing party before it gets to a city.
Always keep artillery or tanks around but not in cities, at least 1 space away. That way if a city gets bombed, you can reconquer it quickly.
Emergency Defensive Strategy
If the enemy has invaded your continent, immediately switch all city production to Tanks, and start flying in as many Helicopters from other sites that you can spare.
Your number one goal at this time is to prevent additional cities from being captured, so get rid of the artillery and Tanks as soon as you spot them. If you have a bomber, it can be to your advantage to bomb the city first invaded, so the enemy can't fly aircraft to your continent.
No matter how serious the invasion, don't let it slow down your exploration that is going on elsewhere.
Endgame (winning) Strategy
If you have more than 75% of the cities, start switching your city production to Bombers. Continue playing as before, and when the bombers become available, take out as many enemy cities as you can. Never change more than 50% of your cities to Bomber production, or your enemy could make substantial inroads into your territory.
Endgame (losing) Strategy
If you have less than 25% of the cities, it's time to dig in and don't look back. You can come back at this point, although it isn't likely or easy. Start changing your production to Artillery and Tanks, with the rest as fighters and Helicopters. You can hold off an enemy much longer this way, and if they turn to Bombers to hasten the end (see above), you can quickly recover any destroyed cities.
General Fighting Strategy
Try to avoid fighting full scale on more than one "front." Focus on one to win, instead of losing both.
Chase after Transports and sink them at all costs.
If the battle is more than 10 spaces away from your city or carrier, you can still send fighters and 'copters there. They stand a good chance of being killed, anyway.
Island World Strategy
Playing an Island game is different than a normal world, and requires an altered strategy. Command of the seas is obviously an important aspect, but more so is the emphasis that needs to be placed on defense. I like to have destroyers patrolling around conquered islands, as well as the standard air patrols. In addition, more defensive Army pieces than usual are needed, since it is so hard to divert forces in this world.
Desert World Strategy
In Desert Worlds, there are often no port cities. But if you find one, it's a great place to build transports to take Armies far away very quickly. Helicopters are the most valuable piece on a desert, where the invasion force is crawling across the sand, ready to be pummeled by the 'copter's air-to-ground firepower.
Ice World Strategy
Just as the Rebels needed special ships to defend against the Imperial Walkers and Snowtroopers on Hoth, so you to will need to determine the best pieces that can survive in a glacier covered world. The chances of your ships being sunk by a rogue iceberg are pretty good, and those chances increase for bigger ships. Fighters and Bombers need to be de-iced before taking off, and you need to have your head examined if you actually think that there's an Ice world setting in StratCon 4.
Large World Strategy
Heckuva lot of area, Heckuva lot of cities (100). Keep the exploration going at full throttle. If you can take over a continent deep in your enemy's territory, he'll eventually have to defend on two fronts -- always a losing proposition. Use Carriers and fighters to map out as much as possible. Let no square remain dark!
Small World Strategy
With only 25 cities, you've gotta get out there fast and secure more than 1/2 right away. The game can be over quickly once one side gets 15 (3/5's) of the 25 cities. Helicopters and Tanks are the force in these games. In the Small world, after the initial exploration, concentrate on killing the enemy and taking his cities from him.
Common Problems
This is a list of the most common calls we get about Strategic Conquest 4.0. Check this list before you call us, and we'll be a lot less likely to tell you to RTFM. ("Read The Manual.)
I can't get my Transport to unload.
Strangely enough, when you drag a Transport to move it, all the Armies on it fall asleep. What you want to do is this: When the Transport asks you to move it, Wake the Transport (and therefore all the Armies on board). Then click square by square to where you want to unload. Do not drag the Transport. When you're done, your Armies should be awake and capable of unloading.
My Armies keep losing to unoccupied cities.
As the game progresses, it becomes more and more likely that you'll have trouble conquering a city, whether neutral or enemy-occupied. Keep trying, and eventually you'll get it. If it make you feel any better, the enemy is running into the same problem.
I can't hit armies on the shore with my Battleship.
Just click on the Army you want to hit. Don't click and drag the Battleship onto the Army. (Strategic Conquest thinks you're trying to run the Battleship aground.)
I've been fired from my job for playing StratCon at work.
Oops. Sorry. Maybe we'll include a warning label on future releases.
I can't win on the highest skill levels.
We tried to rig the game so it's virtually impossible to win on the highest skill levels, so that there would be a continual challenge for good players. So don't feel bad. I can't win on level 15 any more.
I can't build Dreadnoughts, and what happened to the Tech window?
Wrong game. You must be thinking of Spaceward Ho!.
The game is much harder than it used to be.
We improved the Artificial Intelligence. The old level 8 (from version 2) is roughly equivalent to the current level 4.
I can't move my Armies onto land on the edge of an island.
Look for the light blue line that indicates the edge of land. If the area you want to put an Army on isn't in the blue lined area, it isn't sturdy enough to support tanks or artillery.
Should I stay, or should I go?
If you stay, there will be trouble. Or is it the other way around?
Our Mailing List
If you have an e-mail address on the Internet, you can subscribe to the Delta Tao mailing list. Send a message to:
majordomo@outland.com
The subject doesn't matter, but the body of the message should be:
subscribe deltatao-announce
That'll keep you up to date, with news of our new products, strategies, questions and answers, and various propaganda.
Our Web page:
http://www.outland.com/deltatao
About Strategic Conquest
Strategic Conquest was originally written in 1984 and 1985 on a Lisa. (Back then you couldn't develop software on a Mac.) It ran on a 128K Macintosh with a single 400K floppy drive. Even with these limitations, it was a fascinating strategy game. It had, and has, two big advantages over other strategic military simulations, computer or otherwise. First, it handled limited information brilliantly. This means that you don't know exactly where the opponent's pieces are. In fact, at the beginning of the game, you don't even know where the continents are. The second important feature of Strategic Conquest is a simple graphical user interface. Just click and drag a piece, and off it goes.
Amazingly enough, Strategic Conquest 1.0 compares favorably to today's Mac games. Yes, this version has improved graphics, cleaner sound effects, better world generation, new and improved bugs, and a more intelligent computer opponent, but it's essentially the same classic game -- one of the best strategy games for any personal computer.
The History of Delta Tao
Delta Tao was born in 1989, when Joe Williams and Tim Cotter ("The Amazing Timmer") tired of complaining about the high price and low quality of software and decided to do something about it. They wrote Color MacCheese, the first affordable color paint program -- $49 when its closest competitor was $599. When Color MacCheese sold lots of copies, we took the plunge and dedicated ourselves to starting a little company to write Mac software.
Many people asked, "Why Delta Tao? Sounds like a fraternity." There is a reason. "Delta" is the symbol used by engineers around the world to signify change. One would say "Delta V" when he means "change in velocity." We admit this is engineerspeak, but forgive us for a minute. We're mostly engineers, so this makes sense, at least to us.
"Tao" (pronounced DOW) is a Chinese word that means "the Path," or "the Way." It is the big concept behind Taoism. We're mostly Taoist sympathizers around here, so this made sense too.
When you put these together, "Delta Tao" means "The Changing Path," or "The Change in the Path." We thought that this was almost a profound statement of direction, so we adopted it as a name.
We want to stifle all rumors right now that this name may have evolved in any way from the name of our college "fraternity," Delta Tau Sigma (at Caltech, if you must know). All such statements are unfounded, and any similarity in the names is coincidental. Any references to a Mr. Dan Schwartz are also hereby disavowed. Also, it has nothing to do with Animal House frat "Delta Delta Tau," or because we wrote Color MacCheese in Delta Junction, Alaska. These things are just coincidence. Really.
Delta Tao (now expanded to include Eric Snider, Peter Commons, Howard Vives, Christie Cooper, John Speck, Bob Van de walle, Paul Toth, and several others) is out to convince people that computers and technology are important, fun, and useful tools that can change the way the world works for the better. We believe that the Macintosh is the greatest computer on the planet, so we're focusing on writing cool Mac software. Like games.
We're tired of certain other computers having more, better games than the Macintosh. We hate seeing ports from other systems dominate the Mac game market. This takes away from the Mac's biggest advantage -- the user interface. Instead of just using our standard Mac stuff, we have to put up with the varied and difficult user interfaces those other computers have.
We love the Mac, and love computer games, so we bite the bullet and write great games for the Mac. Even if our games don't make us a huge profit (and they don't, trust us), they need to be done, just to spur the Mac into the homes, where it belongs. Besides, we want to play them.
Someday we hope to be famous.
Since we don't do much of anything in the way of marketing or advertising, we depend on word of mouth. That means we want you to do our advertising for us. Tell all your friends how great our products are. Call up local software and computer stores and ask them to carry our stuff.
Call us and tell us the names of your local software stores, so we can nag them from our end.
We also like encouragement. Surprisingly, none of us is making a huge fortune in the software business. Yet. We do it because it's fun, and because we like to believe we're making the world a happier, better place. Send us a letter telling us if you think we're cool. Chat with us via e-mail. Invite us to dinner. We love that stuff.
Yeah, we know we're the only software company in the world that thinks "customer support" works this way. But we deserve it.
Delta Tao Frequently Asked Questions
We're a bunch of engineer types who like to sit around writing games. This amazes everybody: Half ask, "How can they make a living doing that?" and the other half ask, "Why would anybody want to?"
How many of you are there?
Between five and twenty, depending on how you count us. Ten's a fair guess.
Do you work out of your house?
Yep. Each of the programmers has an office in his house, and the phone-answering, testing, and frenzied partying happens at TaoHouse.
Are you guys rich?
Spiritually. We make half the money as we would working for a real company, but we have twice as much fun, which more than makes up for it.
Are you guys a cult, or a fraternity, or what?
We prefer "fraternicult."
Nah, really we're just nerds with a mission.
Mission?
Proving computers are fun.
Is that a lawyer behind you?
Oh, I meant, "Proving Computers are Fun."
Why do you like Macs so much?
It's been proven statistically that Macs are more fun, as demonstrated by the SSR -- the Smiling/Swearing Ratio. Mac users have an SSR of 11.7, while Windoze users are more along the lines of 0.04. And this number is generally agreed upon in the industry, despite the fact that I just made it up.
About This Manual
This manual was written by Joe Williams using FrameMaker software from Frame Technologies. The fonts are various styles of Garamond, Italia, and Mistral. The graphics for the cover were created in Color MacCheese and Zeus. The screen shots were taken with Flash-It, and were doctored with Color MacCheese. Everything was output on a Hewlett-Packard 4M.
In case you didn't figure it out, yes, we do everything on Macs.
About the Packaging
Strategic Conquest comes in a small package, without any fancy styrofoam popcorn or glow in the dark stickers. The manual is thin, concise, and to the point. We did this on purpose.
We hate big, fluffy, wasteful boxes. We've done our best to avoid putting anything in the package that you'll just throw away anyway. The first step to being ecologically friendly is to generate as little garbage and waste as possible. We like trees, and hate landfills.
Here's an experiment. Buy 10 Macintosh products. Count how many have a lot of filler making the box look bigger. See how much smaller the box could be if the goal wasn't to simply have a bigger box. Call those companies and tell them to make their boxes smaller. See what they say.
Technical Support
We think the single most important thing a software company provides (other than software) is Technical Support. We pride ourselves on being able to solve virtually any problem one might have with Strategic Conquest, and lots of other problems as well. If you call us directly at (408) 730-9336 at reasonable California business hours and ask for Tech Support, we'll be happy to help you with anything we can. It's also possible that you can get us at unreasonable hours, since we work hard and late, but we can't guarantee it.
760 Harvard Ave. Sunnyvale, CA 94087
Keep in mind that we're understaffed, overworked, and appreciate brevity. If you can answer questions like "What version of the System are you running?" without checking, we'll be ecstatic. If you call with questions like "What's a Macintosh?" we'll be peeved. Okay?
(408) 730-9336 joedelta@aol.com
Our Motto: "All the tech support that's fit to give."
Our Stand on Copy-Protection
We at Delta Tao think that copy-protection is an evil thing that could damage the growth of the software industry and the computer industry as a whole. We hope you'll boycott all copy-protected products. Here's why.
We believe people have a certain amount of money to spend on software. After they blow their software budget, they still want more software. If copy-protection is preeminent, they are out of luck. The software they buy is the only software they have. They find their Macintosh less useful, and don't encourage their friends to buy one. The hardware and software industries dwindle and die.
On the other hand, if things aren't copy-protected, people pirate software once they've blown their software budget. They learn what programs are good and useful first hand. The next year they will make informed decisions about what software to purchase. In the meantime, they find their computer more useful and friendly. They recommend it to their friends, who go on to become software purchasers.
There are two problems. Number one, in a world where some programs are copy-protected and others aren't, people may buy copy-protected software (since that's the only way they can get it) and pirate the unprotected software. This rewards the businesses who are damaging the industry, and punishes those who help it along.
Number two, publishers without copy-protection can't sell bad software with massive advertising. Since people tend to try software before they purchase it, companies only sell their products to people who find it useful. This means companies with inferior products, but big budgets, should like copy-protection.
We don't mind problem number two so much, but the first problem scares us. The solution: boycott copy protection. Make sure it isn't profitable to copy-protect software.
Before the Software Publisher's Association has us lynched (they claim that "billions of dollars of revenue are lost every year to piracy") we'll invent at least a little bit of evidence for our theory. Remember back when the cassette tape was invented? People could now copy records indiscriminately, and there was nothing the record company could do about it. "We're doomed!" they shouted. "Now we'll only sell one of each record!" What really happened? The music industry took off to previously unimaginable levels, generating more profits for more artists than ever before.
When VCRs were first available, people could copy movies indiscriminately, and there was little the movie companies could do about it. "We're doomed!" they cried. "Now we'll never sell another movie!" What happened? The movie industry took off to previously unimaginable levels, generating more profits for more people than ever before.
Pay for software based on its quality, not its advertising, packaging, and copy protection.
Suggested Reading
These are a couple of books that don't have anything to do with Macintosh software, or solitaire, or cards, or anything, but we always enjoy reading them. On top of that, they embody the Delta Tao philosophy. In the years we've been recommending these books, we've never heard a complaint that one wasn't worthwhile.
The Tao of Pooh
, by Benjamin Hoff, Penguin Books, New York, 1982. The best book on Taoism ever.
Calvin and Hobbes
, by Bill Watterson, Andrews and McMeel, Kansas City, 1987.
The Macintosh Way
, by Guy Kawasaki, Scott, Foresman and Company, Glenview, Illinois, 1989.
Surely You Must Be Joking, Mr. Feynman, by Richard Feynman.
The Straight Dope, by Cecil Adams.
Nobody's Business if You Do, by Peter McWilliams.
Delta Tao's Other Games
If you like Strategic Conquest (and we suspect you do), we hope you'll try the other stuff we make -- it's cool, too.
Spaceward Ho! 4.0
Our "conquer the galaxy" game has earned critical raves and a fanatical following. Similar to StratCon, but possibly more sophisticated.
Eric's Ultimate Solitaire
Includes 17 challenging card games, including Spider, Forty Thieves, Towers, and (of course) Klondike.
Eric's Ultimate Solitaire CD
23 games, including Pyramid, FreeCell, Three Shuffles, and more. Cheating, music, and killer backgrounds, too.
Dark Castle
This is one of our favorite games of all time. It's a great arcade/strategy game and now it's in color.
Beyond Dark Castle
The sequel to Dark Castle. Available 1997?
Cascade
Available in 1996? Create gorgeous fountains and waterfalls, solve puzzles, and be mesmerized by Eric's newest game. Requires a Power Macintosh for the amazing graphics.
The Fine Print]
We provide this software to you under a license.
You can put Strategic Conquest on your hard disk. Make as many backup copies as you want, but make sure no one besides you uses them.
If for any reason you feel the performance of this software is unsatisfactory within the first 30 days after purchase, you may return it to the place you purchased it for a full refund. We tested Strategic Conquest under a variety of conditions, and we believe it performs satisfactorily and safely. However, no guarantee can be made that it will function on your machine. Especially if your machine is a toaster.
Under no conditions will Delta Tao be responsible for damage to your computer system and/or person (including eyesight damage from playing Strategic Conquest all hours of the day and night), other than refunding the purchase price of the software, even if we've been advised of the possibility of such damage.
Don't sue us for any reason, or we'll stop writing cool games and blame it all on you.
Strategic Conquest, Spaceward Ho!, Dark Castle, and Eric's Ultimate Solitaire are trademarks of Delta Tao Software, Inc. Don't make any other games that use our names. Many other things in this manual are trademarks, too. You'll figure them out.
Congratulations, you have discovered Secret Message #2. We knew somebody read this stuff.
 Potential Installation Problems